All posts by DenvilleAdmin

How To Make Essential Oils

Now that I have you all growing plants out of your pots, bowls, baskets and shoes….let’s take a look at how to make them consumable, other than standard food.

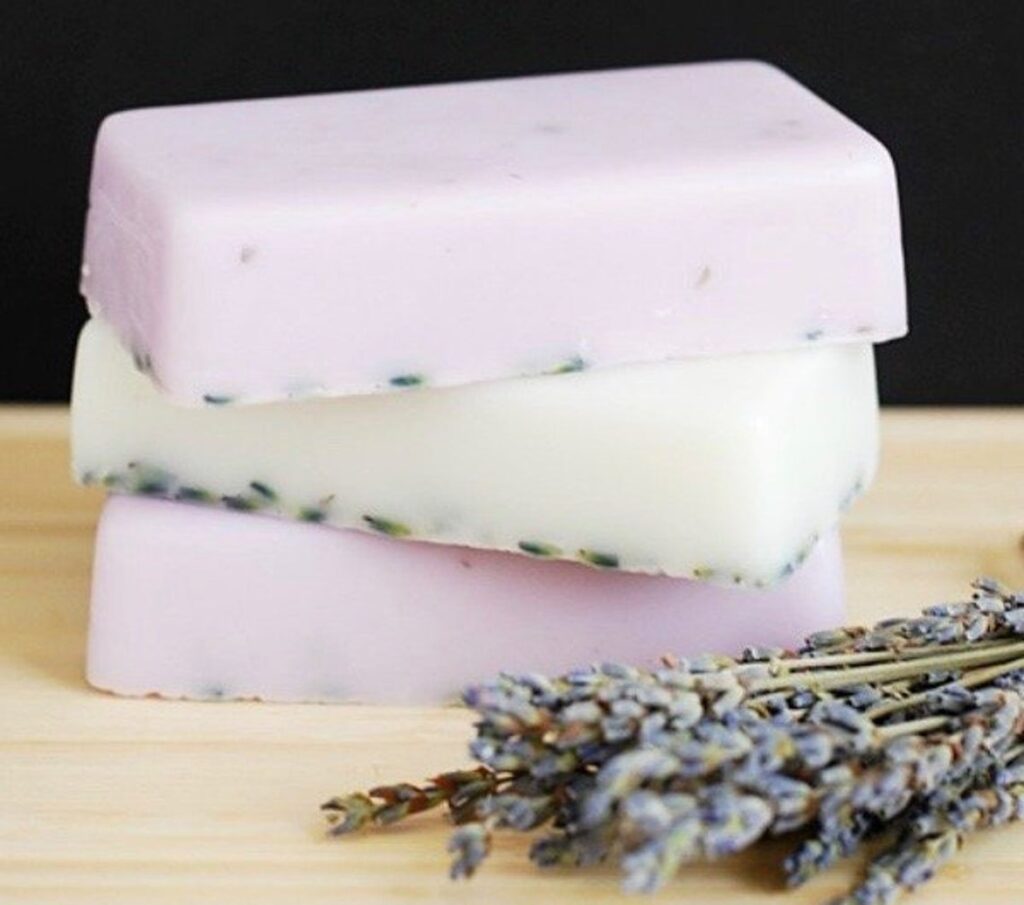
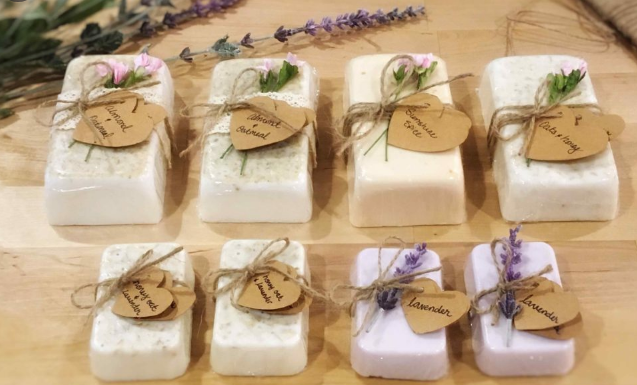
Here, I am showing you how to take the essential oils from herbs to make soap. Let’s go over how to make those essential oils.

Even though I am explaining with Lavender, this is the same scenario for other herbs!

Equipment and Ingredients:

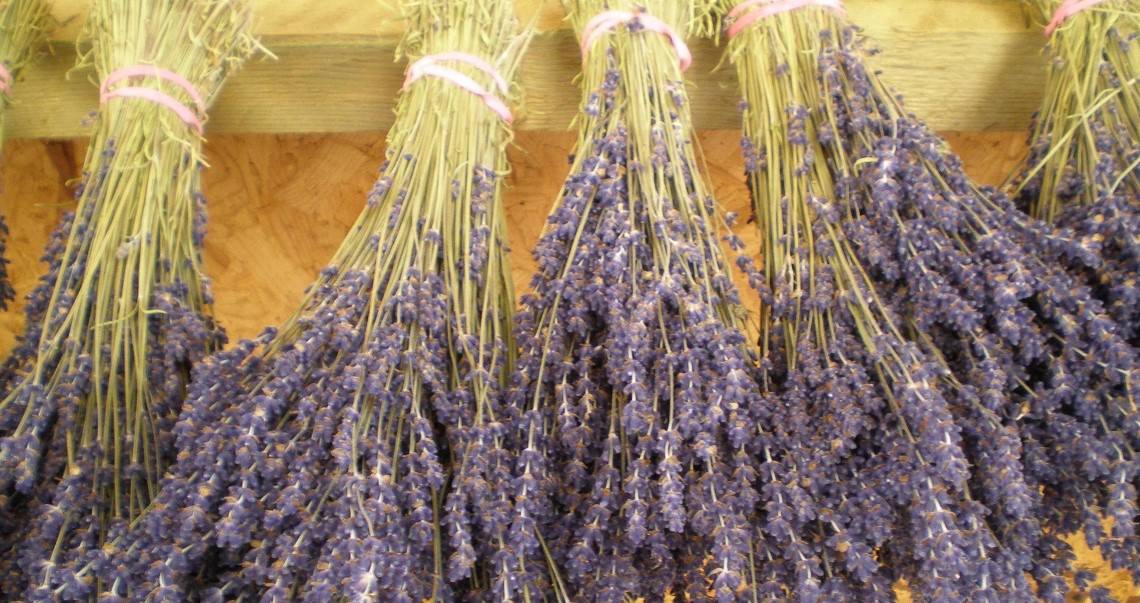
  • Flower buds of Lavender Grown organically (w/o pesticides or fertilzers)
  • Cheap vodka or grain alcohol (but do not use isopropyl/rubbing alcohol)
  • I have a mortar and pestle; but a bowl and spoon will work too!
  • Mason jars (you can keep and use glass jars from your sauces, condiments and jellies that you buy in stores)
  • Coffee filters

There are several ways to create a (Lavender) essential oil, tincture or extract at home, from distilling. Producing what is technically a true essential oil is also known as steam distilling. To make an essential oil, you have to distill the Lavender buds, capture the steam, and condense the steam into a liquid. This requires heat, pressure, equipment, skill and patience. And, distillery is where the word “still” comes from—yes, just like moonshiners. 

Place (Lavender) buds into your bowl or mortar, and crush lightly with the pestle or spoon to release the aromatic oil. Don’t make mush!

Transfer the crushed buds to a jar with a tight-fitting lid. Cover entirely with the grain alcohol or vodka. Shake the jar to release more oil, several times a day, for several days in a row. A longer steep means more intense extraction.

After a week or so of this, you’re ready to refine. Use a coffee filter and strain the liquid and into a second jar. (The pour-off is technically lavender-infused vodka, I don’t recommend drinking it.)

Loosely tie off a coffee filter over the open mouth of the jar you just filtered the liquid into; but don’t put a lid on it. You want air to flow through the jar and allow excess alcohol to evaporate from the oil. Let this stand for about a week.

Now, depending on what you are using this oil for; you may want to strain it one more time through a coffee filter to remove any remaining sediment. Other than that, you can store it for your upcoming crafting, baking, making needs!


Related:

Indoor Gardening

Dwarf Cavendish Banana Plant

GROWING AND STORING FRESH PRODUCE

Lavender As A Crop

How to Make Soap

How to Make Essential Oils

GIFTS FROM THE HEART – SCENTED CANDLES

GIFTS FROM THE HEART – TEA BAGS

GIFTS FROM THE HEART – PERSONALIZED MOUSE PADS

How To Make Soap

Making your own soap has several benefits. Saves money, it’s healthier and you can make money as a product for a side business.

The equipment needed is minimal. More than likely, you already own most of it!

Equipment: Double boiler* (pots* of different sizes can be substituted if a true double boiler is not owned), glass measuring cup, candy or meat thermometer, glass dish, whisk, gloves, goggles, mask and molds for the soap shapes.

*NOTE: Always use stainless steel pots when working with lye. Lye reacts with aluminum and produces toxic fumes*

Ingredients: 2 pounds lard (animal or plant based), 10.5 ounces water, 4.25 ounces lye (Sodium Hydroxide)* , Oils of choice for scent (Lavender recommended solely by preference!), herbs such as ground turmeric (type of ginger) for health benefits.

*NOTE: The gloves, goggles and mask are for working with the lye (sodium hydroxide). It is an inorganic compound commonly found in drain cleaners like Draino. It is caustic and can burn your skin. The mixture will also create fumes. Sounds intimidating; but, the basic safety tips are easy once you do it by the second time!

Instructions:

  1. If you’re using a glass or wooden mold, line it with wax paper.
  2. Put on your protective gear. Pour water into the jar until it reads 10.5 ounces. Then set aside.
  3. Carefully pour 4.25 ounces of lye into the glass dish.
  4. Put your goggles, mask and gloves on now. Carefully and slowly pour the lye into the water. Stir the mixture until the lye is completely dissolved. As you stir, the mixture will become quite hot so be careful if you need to move it. Let it cool to between 100-120 degrees.
  5. Place the lard in a stainless steel pot and put it on the burner. Heat over medium heat until completely melted. Remove the mixture from the heat and let cool to between 100-120 degrees. Use a candy or meat thermometer to test the temperature every 5-10 minutes until it reaches the desired temperature.
  6. Heat the oils and herbs you choose for your soap, like lavender and turmeric (this is where you can get creative once you have the hang of making soap!) in another pot to warm up while the lye mixture cools.
  7. Slowly pour the lye/water into the oils. Blend in the pot, with a whisk, until it resembles a cake batter (3-5 minutes).
  8. Pour the soap into the molds you have chosen.
  9. Put the mold somewhere warm (like an oven with the light on) and let it sit for 24 hours.
  10. After 24 hours, pop your soap out of the mold and cut if needed. Stand bars up in a dry area with space in between each one to allow for air circulation. Let them sit and harden.
  11. When you’re done (with your gloves still on) rinse any supplies that had lye or soap mixture in them with running water. Pour some vinegar in a sink filled with hot soapy water and wash everything in there, then set aside away from your food prep area to dry. Store all soap making tools in a closet or cabinet away from food making tools.
Homemade Soaps!

Now that you have mastered soap making; besides having your own supply, what to do with them all? Gift baskets for the holidays, set up a table in your driveway when there are yard sales on your block, set up a table at Farmer’s Markets, list them on eCommerce sites: Etsy.com, Amazon.com, eBay.com. Launch your own website (don’t know how? I am for hire!)

But now you know you can do it! And you further increased your self sufficiency!

Previous: Indoor Gardening , Growing and Storing Fresh Produce


VICTORY GARDENS


Related:

Indoor Gardening

GROWING AND STORING FRESH PRODUCE

Lavender As A Crop

How to Make Soap

How to Make Essential Oils

Lavender as a Crop

Some small growers tend a few dozen plants in their backyard or indoors in buckets, and are happy to make a few hundred dollars.

Larger operations on acreage can bring in hundreds of thousands, especially if they also produce and sell value-added products (soaps, sprigs, oils).

Purple Haze Farms, in Sequim, Washington, for example, routinely grosses over a million dollars a year with about 8 acres of lavender. Fresh lavender bouquets are a very profitable way to sell lavender.

Most growers sell direct to the retail public (craft stores, florists), either from their garden or at the local farmer’s market. At our local Sunday farmer’s market, lavender bunches sell for $6 each. A 20′ x 20′ growing area can produce around 300 bunches each year, worth $1,800.

Larger plots are even more profitable. A quarter-acre can produce about 3,000 bunches, worth $18,000. Unsold lavender bunches can be dried and sold to crafters and florists, who use the bunches for dried floral arrangements.

Also, the flower buds can be removed from the bunches and sold or used to make sachets and other value-added products. Other lavender products, such as lotions, oils and soaps, bring 500% or more markups from the price of the basic ingredients.

Lavender Sprigs

Related:

Growing and Storing Fresh Produce

“Back in the day” more people lived on farms, which meant food storage was a way of life. You planted in the spring, tended the crops all summer, and preserved the food in the fall. They canned, dried, smoked meat, and stored root crops in root cellars. Many had chickens and cows. They did this to survive until the next planting season.

With today’s uncertainty of viruses, shut downs and less employment; having an indoor garden producing during fall and winter is a smart move.

  • Increases our self sufficiency;
  • Saves money on groceries as well as food storage;
  • Feeds our families more nutritious food without all the fillers and chemical preservatives;
  • And self satisfaction of knowing we can do it if we have to.

Freezing home grown produce to 0°F is the easiest, most convenient, and least time-consuming method of preserving foods.

Freezing Fruit:

The only equipment needed for freezing foods are clean containers that are designed specifically for freezing food, such as freezer bags, plastic freezer containers, or Mason jars . (Do not use glass jars that are not specifically for canning/freezing as they may break easily.)

Containers should be moisture/vapor resistant to prevent “freezer burn.” Using a vacuum sealer is the best way to prevent freezer burn.

Choose fruit that is fully ripened for the best taste and nutrition. Wash thoroughly and cut off any bruised or damaged parts. If you see any mold at all, discard the fruit.

Cut into serving or bite-sized pieces for easier serving when thawed later. Do not blanch fruit as it will be mushy when defrosted.

Cut fruits usually taste better if frozen in a sugar syrup or dry sugar which coats the fruit and protects it from the enzymes that change the color to brown. Use dry sugar for fruits that easily produce juice such as strawberries and peaches. Those that juice more slowly need a sugar syrup such as pineapples and apples.

Small berries such as cranberries, blueberries, raspberries, blackberries, and currants can be frozen without sugar.

To prevent fruits such as apples, peaches or pears from turning brown when exposed to air, dip them in ascorbic acid or lemon juice.

Label the container with the date and the name of the product.

Freezing Vegetables:

Freezing vegetables is a little different – they need blanching before freezing. What is blanching? It means to cook slightly before freezing. (Fruit does not need blanching; it will just make fruit mushy.)

  • Wash, peel, and trim away bruised areas. Cut into serving sizes, if desired, before freezing. Blanch all vegetables (except peppers and onions) to preserve quality and stop the enzymes that cause spoilage.
  • In a large sauce or stock pan, bring water to boiling. Place the prepared vegetables in a metal strainer that will fit in the pan and lower food into the boiling water. Begin counting the blanching time. (See table below for blanching times.)
  • Use one gallon of water for each pound of firm vegetables (about 4 cups) and two gallons of water for each pound of leafy greens (about 8 cups). Don’t add more vegetables than suggested at one time, as larger amounts will lower the temperature of the water. Time and temperature are critical to destroying the enzymes that cause spoilage.
  • When the blanching time is done, plunge the vegetables into ice water until cooled. This prevents them from over cooking and helps retain the nutrients and color. When cooled, drain and dry thoroughly. Drying the vegetables is important because extra moisture can decrease the quality and cause more ice to form on frozen veggies.

It is important to pack the food in the appropriate plastic freezer containers. Use freezer ZipLoc bags, plastic freezer cups, canning bottles, or vacuum sealing bags. Leave 1/2 inch of headspace for dry food and 1 to 2 inches for food covered with liquid/syrup.


Chest Freezer for more storage space in your house and easy access. The chest freezer features a balanced hinge design so you can ensure that you can get in and out of it with ease. On Sale: $161.10.

Bring in the experts!

Related:

Indoor Gardening

Dwarf Cavendish Banana Plant

GROWING AND STORING FRESH PRODUCE

Lavender As A Crop

How to Make Soap

How to Make Essential Oils

Previous: INDOOR GARDENING

Indoor Gardening

It is unknown to us all what Disease X will bring. A surge, a vaccine, a shut down….

One thing we all can do is prepare. Start an indoor garden now. Plants inside reduce stress, clean the air and increase oxygen. Make them vegetable and fruit plants and you also get food!

Think you don’t have room for plants? Plants can grow in containers, pots, wicker baskets, pails, tubs and even old leather boots!

Herbs growing in Closet Door Shoe Holders
Plants Indoors Can Also Be Living Art!

Keep in mind, if the plants you grow indoors require pollination to produce, you will have to do this manually with a wooden toothpick 3-4 days after a flower blooms.

I changed all my indoor lightbulbs to grow lights. This not only provides benefits for vitamin D production; but, maximized the space for more plants and their growth.


Related:

Indoor Gardening

Dwarf Cavendish Banana Plant

GROWING AND STORING FRESH PRODUCE

Lavender As A Crop

Make Soap

Make Essential Oils

GIFTS FROM THE HEART – SCENTED CANDLES

————————————————————————–

#Denville WINS BEST DOWNTOWN {2020}!

#downtowndenville #LoveYourLocal

EXCERPT: Denville has been crowned Best Downtown in Morris County by the 2020 Readers’ Choice Awards from Morris/Essex Health & Life magazine! Beyond the overall downtown award win, many of our stores, restaurants, and service-based businesses have taken top honors in their individual categories as well (see below). This comes as no surprise as downtown Denville is a consistent destination to many that seek out our top-rated restaurants, boutiques, and all ’round charming atmosphere.

/Excerpt Read More at downtowndenville.com

Congrats #downtowndenville! #DenvilleProud


Create a Victory Garden! – Learn More

Find a fun seed variety pack and have fun growing your own vegetables!

#MorrisCty – HOME SCHOOL PROGRAMS

Morris County Park Commission enjoy the experience

Ages 5-12 – Register for Horticulture Home School Programs Here!

September 22 – Plant Genetics and Successful Seed Savers

October 20 – Ferns and Fun!

November 17 – Clean Air by Plants

December 15 – Water, Water, Everywhere!

Ages 5-12 – Register for Environmental Education Here!

September 8 – Monarch Madness

October 6 – Amazing Lenape Artifacts

November 3 – Apple Cidering

December 1 – Owls and Owl Pellets

Ages 5-12 – Register for Historic Sites Here!

September 15 – Back to School Potions

October 13 – Spider Sense!

November 10 – Cook It Up 101

December 8 – Winter on the Home


Create a Victory Garden! – Learn More

Find a fun seed variety pack and have fun growing your own vegetables!

#Denville Library Presents – “CONQUERING EVEREST – VIRTUAL PROGRAM”

September 15, 2020 – 7pm- 8pm – Another cool and unique virtual presentation at #Denville Library! Sign up for a story that will keep you on the edge of your seat!

Climber Dan Stringham brings tales of scaling the highest peaks of Mount Everest and Mount Kilimanjaro! He and his team came face to face with avalanches and survived! Hear his harrowing tale!

Register at #Denville Library!

Denville Public Library
121 Diamond Spring Road
Denville, NJ 07834
Phone: (973) 627-6555

Previous: Denville Library Also Presents: EXTREMELY COOL AND UNIQUE #DISTANCELEARNING OPPORTUNITY @DENVILLELIBRARY !


Create a Victory Garden! – Learn More

Find a fun seed variety pack and have fun growing your own vegetables!

Extremely Cool and Unique #distancelearning Opportunity @denvillelibrary !

Who doesn’t love dogs? Want some unique behind the scenes stories on Dog Mushing and Racing? @denvillelibrary has a virtual event for you!

September 24, 2020 , Thursday 7:00 PM – 8:00 PM Must Register!

STRING OF DOGS: ONE WOMAN’S EXPERIENCE WITH DOG MUSHING AND RACING IN THE IDITAROD – VIRTUAL PROGRAM

Denville Library is hosting a virtual meet with Karen Land, dog musher and three-time racer in the Iditarod, a race through the Alaskan wilderness.  Meet two of her dogs, Noggin and Chloe, and learn about training and racing dogs.  Wear your favorite winter hat to the presentation to help get into the cold-weather mindset.   Your canine friends are more than welcome to join the fun too!

After you register, you will get a link for the Zoom meeting which you will need to access the program.

Denville Public Library
121 Diamond Spring Road
Denville, NJ 07834
Phone: (973) 627-6555

Related: Denville Library Also Presents: DENVILLE LIBRARY PRESENTS – “CONQUERING EVEREST – VIRTUAL PROGRAM”


Create a Victory Garden! – Learn More

Find a fun seed variety pack and have fun growing your own vegetables!

#Denville Sunrise Rotary Club, The Great [Virtual] Duck Race 2020!

The Denville Sunrise Rotary is proud to continue our long tradition of the Great Denville Duck Race. This year we’ve moved the fun online! You can order a duck using this online form and choose pick up or local delivery:

https://forms.gle/jU4msM5ZSDwoMh966

Each duck purchase enters you in both the Virtual Race and the Decorating Contest. Post your decorated duck photos to Facebook or Instagram using #Denville2020. Should you have any questions please reach out to denvilleduckrace@gmail.com. Thank you for your support!


Create a Victory Garden! – Learn More

Find a fun seed variety pack and have fun growing your own vegetables!